This guide's notation for describing an Elemental:Neon solution is based on the fact that its moves fall naturally into sequences of four moves. The plunger ends of the puzzle block all other sequences such that after the first move the next three are determined. Moves that do not follow this pattern reverse the previous move or lead to blocked moves.
The basic primitive group of four moves is as follows:
|
|
|
|
|
|
|
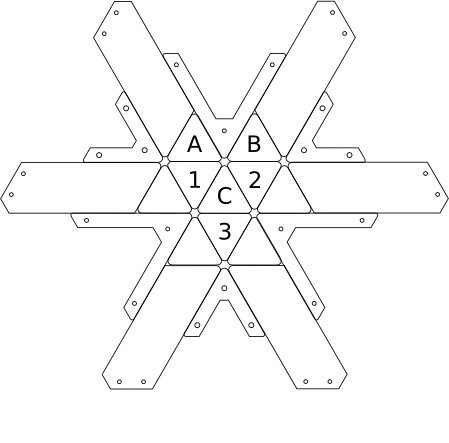
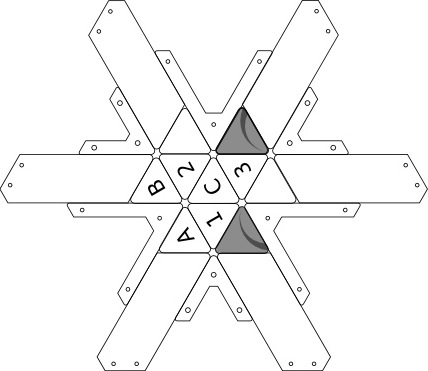
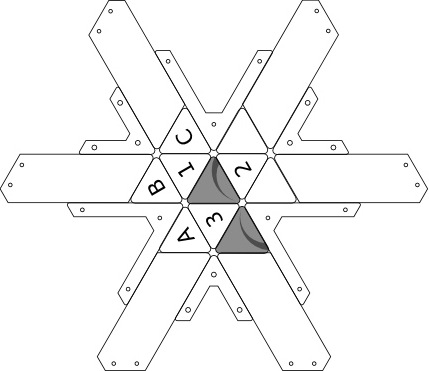
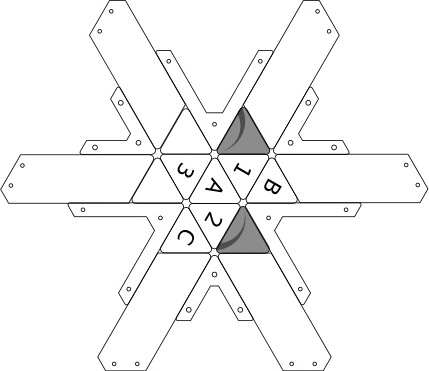
This primitive can be reversed, and can be performed in any one of the three orientations of the puzzle (120 degree rotations). This defines a set of six primitives to move pieces.
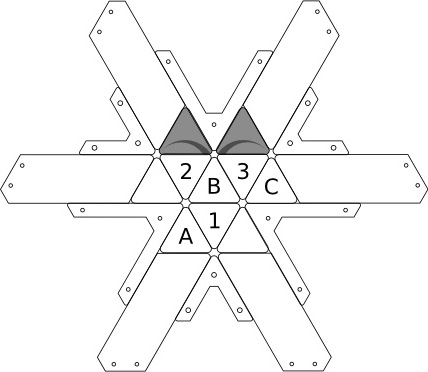
You will note from the diagrams above this primitive has two results: The group ABC is rotated clockwise, and the group 123 is also rotated clockwise. Doing the move in reverse will rotate these two groups counterclockwise.
The notation for the primitive displayed in the above diagram is: / \ / \
The '/' and '\' characters represent the plungers of matching the character's orientation.
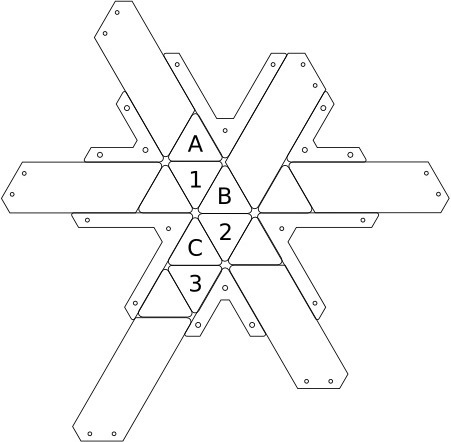
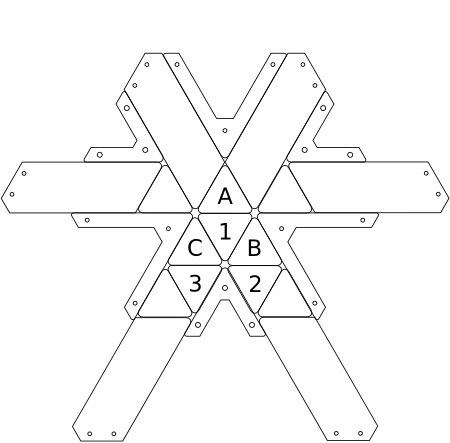
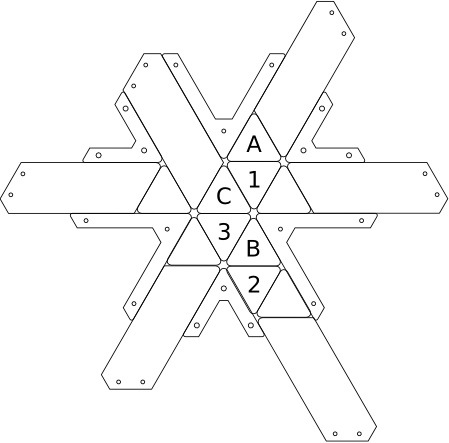
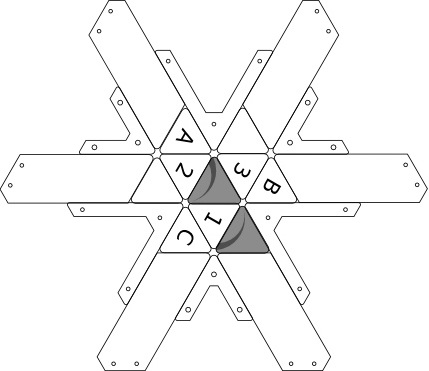
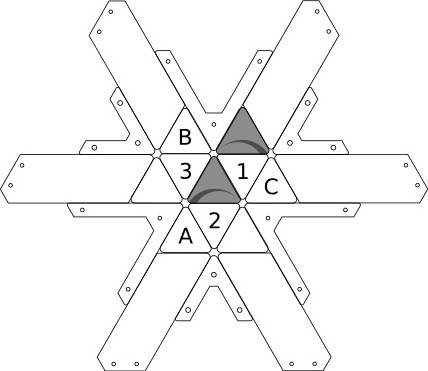
This primitive is comprised of four moves starting with the / plunger (down), followed by the \ plunger (down), the / plunger (up) and finally the \ plunger (up). The primitives always move down, down, up, up, and always alternate plungers.
The reverse is primitive is noted: \ / \ /
Rotations of the puzzle are noted with: ---> for clockwise rotation (120 degrees) and: <--- for counterclockwise rotation (120 degrees)
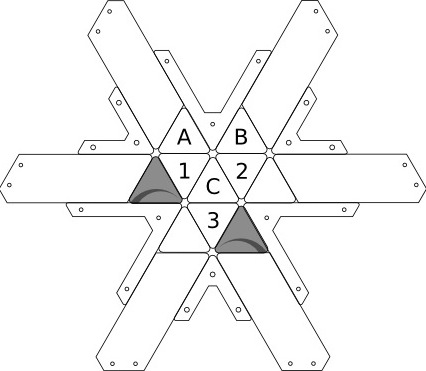
The BioHazard symbol is a bit abstract, and often the shapes can be confused and placed in the wrong positions.
|
You will note that in the solved position the arcs curve from the center out (thick in the center and thinning as they arc out), and are generally horizontal. It is easy to confuse this, once scrambled, with another configuration where the arcs curve up. |
|
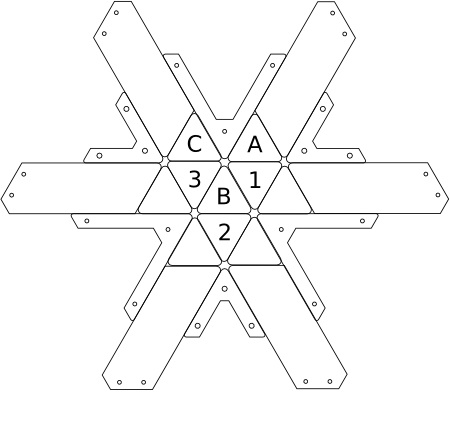
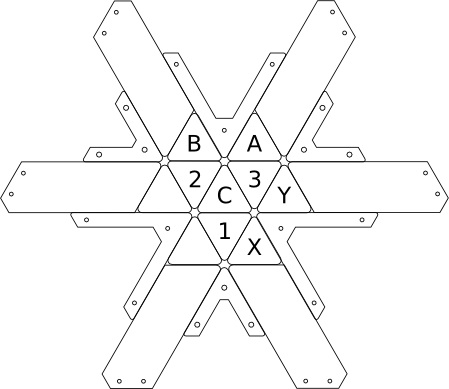
Because the Elemental:Neon has two independent groups (one with seven pieces and one with three) we use the above primitives to place the pieces of the seven piece group (the group containing ABC and four side pieces) first, and then use a sequence to rotate the three piece group (containing 123) that does not disturb the seven piece group.
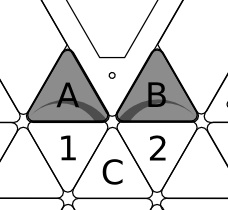
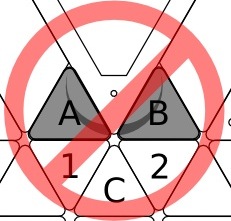
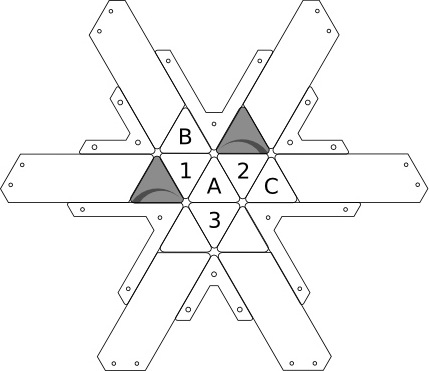
To place the correct pieces in A and B, you will look to first place the piece destined for A into B's slot, and the piece destined for B in the center position (C). This way by rotating counterclockwise both pieces will be properly positioned in A and B.
You can also do the reverse, placing the piece destined for B in A's location and the piece destined for A in the center.
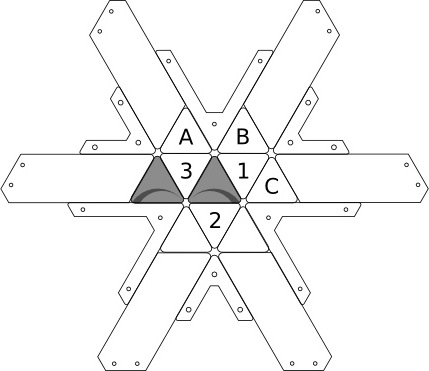
When solving the seven piece group, look for pieces generally horizontal (curving up then down) for the orientation you are holding the puzzle. If they are not in either A, B, or the center, rotate the puzzle until the piece is in the A or B position. Now apply either the / \ / \ or \ / \ / primitive to move the piece to the center. You can now rotate back and move the piece into place.
For example, these diagrams illustrate positioning two pieces:
|
|
|
|
|
|
|
|
|
This sequence would be noted:
<--- / \ / \ ---> \ / \ / ---> / \ / \ <--- \ / \ /
After placing two sets of these pieces the third will just require rotating the center piece to the center position.
A slightly tricky situation is when A and B are swapped, in which case you need to move A to the center then out to the side which will allow you to rotate B into A's position without moving A. Now A can return to the center and then rotate them both into place:
/ \ / \ ---> / \ / \ <--- \ / \ / ---> \ / \ / <--- / \ / \
The sequence above moves A out to the right side. If the pieces to the right are already solved, reverse rotations can be used to instead move A out to the left side.
|
Consider the sequence above that swaps A and B. If we add a final: ---> / \ / \, the center piece will be restored from the side, and we will find we have swapped A for B, but also swapped the two side pieces X and Y. In doing so, the three piece group has been rotated counterclockwise: |

|
|
Consider now applying this move twice. The AB and XY swaps will cancel out, and two counterclockwise rotations of the 123 group will equal a clockwise rotation of the 123 group.
The final 123 group clockwise rotation move is:
/ \ / \ ---> / \ / \ <--- \ / \ / ---> \ / \ / <--- / \ / \ ---> / \ / \ <---
/ \ / \ ---> / \ / \ <--- \ / \ / ---> \ / \ / <--- / \ / \ ---> / \ / \ <---
This can be reversed to form a counterclockwise rotation of the 123 group:
\ / \ / ---> \ / \ / <--- / \ / \ ---> / \ / \ <--- \ / \ / ---> \ / \ / <---
\ / \ / ---> \ / \ / <--- / \ / \ ---> / \ / \ <--- \ / \ / ---> \ / \ / <---